Key Takeaways:
- Annual Inspection is Crucial: Regular water heater inspections and maintenance can improve efficiency and extend the lifespan of your unit.
- Drain and Flush the Tank: If you have a traditional tank water heater, flushing out sediment buildup is essential for optimal performance.
- Adjust the Temperature: Lowering the temperature by 10 degrees can help reduce energy costs without compromising comfort.
- Test the TPR Valve: The Temperature and Pressure Relief (TPR) valve is a critical safety component that should be checked periodically.
- Seek Professional Assistance: If you encounter any issues or prefer expert help, contact a professional plumber for a thorough inspection.
Water Heater Inspection: Essential Maintenance Tips for Fall
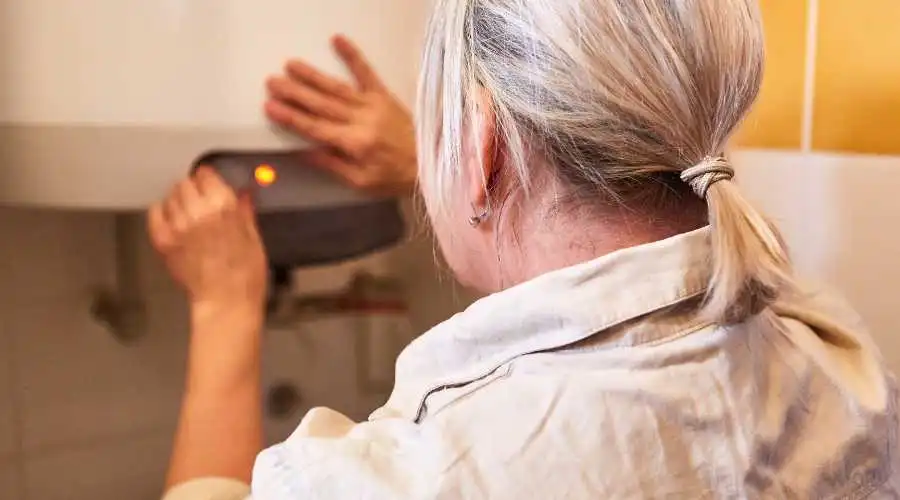
As fall sets in, the temperatures drop, and homeowners begin relying more on their water heaters. The last thing you want is to experience cold showers on a crisp autumn morning. To ensure your water heater functions efficiently, a thorough inspection and maintenance routine is essential. In this guide, we’ll explore vital DIY water heater maintenance tips and when to call in a professional.
Why Water Heater Inspections Are Important
Regular water heater inspections and maintenance help prevent unexpected breakdowns, ensure energy efficiency, and prolong the lifespan of your unit. Over time, sediment buildup, temperature fluctuations, and pressure issues can lead to costly repairs or even replacements if not addressed promptly.
Step-by-Step Water Heater Maintenance Guide
1. Drain and Flush the Water Heater Tank
If you own a conventional tank water heater, annual flushing is crucial to remove sediment buildup, which can reduce efficiency and lead to corrosion. Fall is the perfect time to complete this task, as your water heater will be working harder in the cooler months.
How to Flush Your Water Heater:
- Turn Off Power – For electric models, switch off the power at the circuit breaker. For gas water heaters, turn the thermostat to the pilot setting.
- Allow the Water to Cool – Hot water can cause burns, so wait for a few hours before proceeding.
- Connect a Hose to the Drain Valve – Attach a garden hose to the drain valve located at the bottom of the tank.
- Drain the Tank – Place the hose’s other end in a bucket or floor drain, open the drain valve, and let the water flow out completely.
- Flush with Cold Water – Once drained, briefly open the cold water supply to flush out any remaining sediment.
- Close Valves and Restore Power – Disconnect the hose, close the drain valve, turn on the cold water supply, and restore power to the unit.
Pro Tip: If your water heater makes popping noises, this could be a sign of excessive sediment buildup, indicating the need for professional maintenance.
2. Adjust the Temperature for Efficiency
Lowering your water heater’s temperature by 10 degrees (but keeping it between 120-140°F) can help save on energy costs without noticeable changes in water temperature.
Why This Matters:
- Reduces energy consumption.
- Lowers the risk of scalding.
- Helps prevent bacteria growth in lukewarm water.
3. Test the Temperature and Pressure Relief (TPR) Valve
The TPR valve is a crucial safety feature that prevents excessive pressure buildup, which could lead to an explosion if left unchecked.
How to Test the TPR Valve:
- Locate the Valve – It is usually found on the side or top of the tank with a discharge pipe attached.
- Lift the Lever – Carefully lift the valve’s lever to release some water.
- Observe Water Flow – If you hear water running through the discharge pipe or see water draining, the valve is functioning properly. If not, it may need replacing.
Warning: If no water comes out, or if the valve leaks afterward, turn off the water heater and contact a professional immediately.
4. Inspect the Anode Rod
The anode rod protects your tank from rust and corrosion by attracting corrosive elements in the water. Over time, it deteriorates and needs replacement.
How to Check the Anode Rod:
- Turn Off Power and Water Supply – As with previous steps, always ensure the system is powered down.
- Locate the Rod – Typically found at the top of the tank.
- Remove and Inspect – Unscrew it using a wrench and check for excessive corrosion.
- Replace if Necessary – If the rod is heavily corroded (over 50% depletion), install a new one.
5. Check for Leaks and Corrosion
Inspect your water heater for any signs of leakage or corrosion around the base, fittings, and connections. If you notice rust-colored water or damp areas near the tank, these may indicate a serious issue requiring professional attention.
When to Call a Professional
While DIY maintenance can extend the life of your water heater, certain issues require professional intervention. Contact a licensed plumber if you experience:
- Persistent leaks or visible rust on the tank.
- No hot water despite resetting the unit.
- Frequent pressure valve discharges.
- Unusual noises such as banging or rumbling.
Frequently Asked Questions (FAQ)
1. How often should I inspect my water heater?
It’s best to perform a basic inspection every six months and a full flush annually to keep it in top condition.
2. What temperature should I set my water heater to?
The recommended setting is 120°F to 140°F to balance safety and energy efficiency.
3. Why is my water heater making rumbling noises?
This is likely due to sediment buildup at the bottom of the tank. Flushing the tank should help resolve the issue.
4. How can I tell if my anode rod needs replacement?
Check your anode rod every 2-3 years. If it’s more than 50% corroded, replace it to prevent tank deterioration.
5. Can I flush my water heater myself?
Yes! Follow the steps outlined above. However, if you’re uncomfortable doing so, a professional plumber can assist you.
6. What should I do if my TPR valve isn’t working?
If the TPR valve does not release water when tested, turn off the power and call a plumber immediately as this could be a safety hazard.
Final Thoughts
Regular water heater inspections are a simple yet effective way to ensure your unit operates efficiently throughout the colder months. By following these maintenance steps, you can avoid costly repairs and unexpected cold showers. However, if you ever feel uncertain or need expert help, don’t hesitate to contact a professional plumbing service.
Need Help? Call the experienced team at BJC Plumbing for expert water heater inspections and maintenance today!

